




011 Easing Curves
Scegliere le curve di easing in base alla situazione
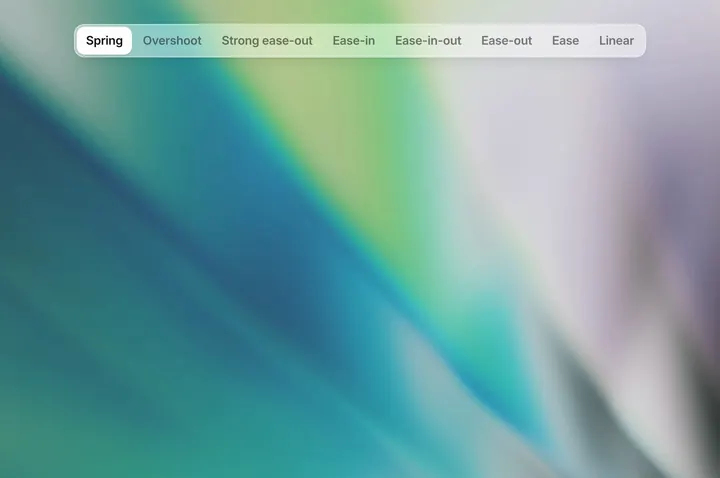
Sette curve di velocità comuni per le animazioni, da Linear a Spring, e il tipo di movimento a cui si adatta ciascuna.
Il ritmo di un’animazione si descrive con una curva di velocità: più la curva è ripida, più bruscamente cambia la velocità e più il movimento sembra veloce. Se l’apertura di un menu, la chiusura di una finestra di dialogo e lo scorrimento di un indicatore usano tutti l’ease predefinito, l’utente non capisce se un elemento sta comparendo, scomparendo o cambiando posizione. Le curve più comuni sono queste:
- Linear: per barre di avanzamento, caricamenti e altre cose che devono solo sembrare «in corso». Moto uniforme, con partenza e arrivo bruschi,
linear. - Ease-out e Strong ease-out: per l’entrata di livelli sovrapposti ed elementi modali, come Toast, menu, finestre di dialogo e pannelli laterali, si usa Ease-out, veloce e poi lenta,
cubic-bezier(0, 0, .58, 1). Per piccoli elementi che arrivano in posizione subito dopo il clic, come icone, testo e una pillola selezionata, si usa Strong ease-out, con una partenza più rapida e una coda più lunga,cubic-bezier(.22, 1, .36, 1): la risposta è la più immediata. - Ease-in: per l’uscita degli elementi, come la chiusura di una finestra di dialogo o la scomparsa di un Toast. Lenta e poi veloce, per un’uscita netta,
cubic-bezier(.42, 0, 1, 1). Non va usata per le entrate: la partenza lenta fa sembrare l’interfaccia poco reattiva. - Ease-in-out: per gli elementi che cambiano posizione dentro l’interfaccia, come l’indicatore che scorre sotto le schede, il cambio di pagina di un carosello o lo scorrimento fluido di un indice. Lenta alle estremità e più veloce al centro,
cubic-bezier(.42, 0, .58, 1). - Overshoot: per piccole conferme giocose, come una spunta, un «mi piace» o un badge che compare. Supera il punto di arrivo di circa il 10% e poi torna indietro,
cubic-bezier(.34, 1.56, .64, 1). Non va usata su pannelli grandi, altrimenti oscilla un’intera parte dell’interfaccia. - Spring: per il ritorno in posizione dopo il rilascio, come un pannello laterale che rimbalza, il trascinamento per aggiornare o l’assestamento dopo un riordino con trascinamento. Arrivato in posizione oscilla leggermente una o due volte e poi si ferma, più simile a un oggetto reale rispetto a Overshoot; quando l’utente rilascia, l’elemento ha già una velocità e la molla può proseguire da quella velocità.
Inoltre, definendo queste curve come token di movimento e usandole in base al ruolo, il ritmo resta coerente in tutto il prodotto.
Il prompt abbinato elenca prima tutte le transizioni e le animazioni del progetto e segnala i punti in cui si usa ancora l’ease predefinito o in cui un’entrata usa ease-in, con la curva da usare in ciascuno; poi aggiunge i token di movimento e regola curve e durate una per una.
Give the motion in my product the right easing curves, so things arrive, leave and move the way they should feel. Work inside my existing code and design system: keep what each animation does, how far it goes and what triggers it. Change how it moves over time, and its duration where that is off.

0. Start from what exists
- Find every transition and animation: CSS transitions and keyframes, animation libraries (Framer Motion, GSAP, the Web Animations API) and hand-written requestAnimationFrame loops. List each with its component, its trigger, its duration and its curve.
- Flag the ones left on the CSS default `ease`, `linear` on something that moves, and `ease-in` on something that appears.

1. The curves as tokens
Define them once, next to the other motion tokens, and use only these:
- --ease-out: cubic-bezier(0, 0, .58, 1). Anything that enters: toasts, menus, popovers, dialogs, drawers.
- --ease-out-strong: cubic-bezier(.22, 1, .36, 1). Small parts settling in right after a click: an icon, a label, a selected pill. It feels the most responsive.
- --ease-in: cubic-bezier(.42, 0, 1, 1). Anything that leaves, and only that: a toast timing out, a dialog or drawer closing, a menu collapsing, a list item swiped away. It starts slow and leaves at full speed, so on an entrance it feels late and then stops with a bump.
- --ease-in-out: cubic-bezier(.42, 0, .58, 1). Something that stays on screen and only changes place or size: the indicator under tabs or a segmented control, a carousel turning a page, items making room during a reorder, a sidebar resizing, smooth-scrolling to an anchor. Not for coming in: its slow start reads as lag.
- --ease-overshoot: cubic-bezier(.34, 1.56, .64, 1). Runs about 10% past its place and comes back. Small, playful confirmations: a checkbox tick, a like, a badge count popping in, a switch knob settling. Never on a dialog, a drawer or anything larger than about 64px, and not on actions people repeat all day.
- --ease-spring: linear(0, .32, .78, 1.04, 1.09, 1.06, 1.02, 1, .99, .99, 1). Things let go after a drag or a swipe, so they settle like an object: a bottom sheet snapping open or back, a card returning after a half swipe, pull-to-refresh springing back, a reordered item dropping into place. Prefer the animation library's own spring fed with the release velocity; use this token only where there is none, and fall back to --ease-out-strong where linear() is not supported.
- linear: only for things that run rather than move: spinners, progress bars, marquees.
- The CSS default `ease` is not a choice. Replace it wherever a curve was left unset.

2. Durations
- Small UI (toasts, tooltips, menus, checks): 150-250ms in, 120-200ms out. Exits are shorter than entrances.
- Medium (dialogs, popovers with content, drawers): 250-350ms.
- Large or full-screen (sheets, page transitions): 350-500ms. Longer feels slow.
- Springs and overshoots: about 1.5x the plain duration, since the settle takes time.
- Keep the durations as tokens beside the curves (--duration-sm, -md, -lg).

3. Apply them by role
- Entrances: ease-out, coming from where the thing belongs (a toast from the top edge, a menu from its trigger), over a short distance (8-24px), growing from 96% and fading in a little sooner than it moves. A light blur (about 8px) that clears as it lands is a nice touch on toasts.
- Exits: ease-in, the same path reversed, and shorter.
- Moves on screen: ease-in-out.
- Parts inside something that has just appeared (its icon, its text, a count) may follow 100-200ms later on the strong ease-out, so it lands in steps rather than all at once.
- Gestures: while the pointer or finger moves, follow it 1:1 with no easing. On release, finish on the spring, from the release velocity if the library allows.
- Hover and press: 100-150ms ease-out. Never animate layout on hover.
- Animate transform and opacity (filter sparingly), not top, left, width or height, which lay out and repaint every frame.

4. Keep it consistent and accessible
- One curve per role across the product. Don't tune each component by hand.
- Respect prefers-reduced-motion: keep the opacity changes, drop movement and scale, and turn springs and overshoots into a plain 150ms fade.
- Never make a user wait on an animation: nothing blocks input, and a new action interrupts the old animation from where it is.

5. Deliver
- First list every animation you found, its current curve and duration, and the role and curve you will give it.
- Then add the tokens, switch each animation over, and list every file you touched.
- Don't change what animates, how far it goes or what triggers it. If an animation has no clear role, ask me first.