





011 Easing Curves
Cómo elegir curvas de easing según la situación
Siete curvas de velocidad habituales para animaciones, de Linear a Spring, y el tipo de movimiento al que se adapta cada una.
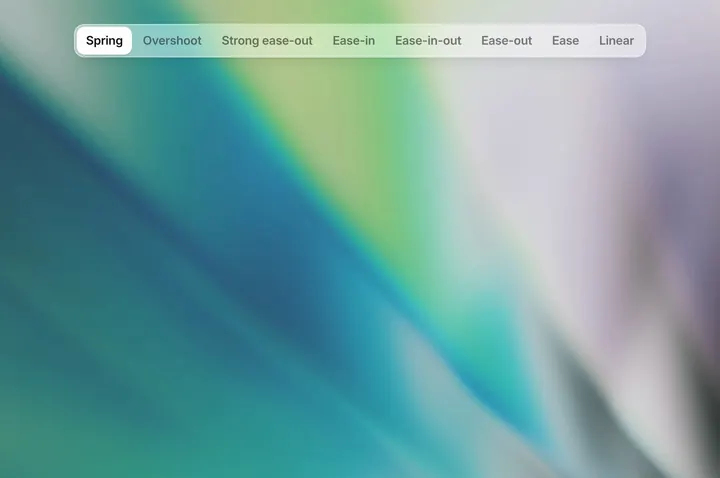
El ritmo de una animación se describe con una curva de velocidad: cuanto más empinada es, más brusco es el cambio de velocidad y más rápido parece el movimiento. Si el menú que aparece, el diálogo que se cierra y el indicador que se desliza usan todos el ease por defecto, el usuario no distingue si un elemento aparece, desaparece o cambia de sitio. Las curvas habituales son estas:
- Linear: para barras de progreso, cargas y otras cosas que solo tienen que verse «en marcha». Movimiento uniforme, con inicio y final bruscos,
linear. - Ease-out y Strong ease-out: para la entrada de capas superpuestas y elementos modales, como toasts, menús, diálogos y paneles laterales, se usa Ease-out, rápida al principio y lenta al final,
cubic-bezier(0, 0, .58, 1). Para elementos pequeños que se colocan justo después de un clic, como iconos, texto o una píldora seleccionada, se usa Strong ease-out, que arranca más rápido y frena durante más tiempo,cubic-bezier(.22, 1, .36, 1); es la respuesta más directa. - Ease-in: para salidas, como el cierre de un diálogo o un toast que desaparece. Lenta al principio y rápida al final, se va sin rodeos,
cubic-bezier(.42, 0, 1, 1). No se usa en entradas: el arranque lento hace que la interfaz parezca tardar en responder. - Ease-in-out: para elementos que cambian de sitio dentro de la interfaz, como el indicador bajo las pestañas, el paso de página de un carrusel o el desplazamiento suave a una sección del índice. Lenta en los extremos y más rápida en el centro,
cubic-bezier(.42, 0, .58, 1). - Overshoot: para confirmaciones pequeñas y desenfadadas, como marcar una casilla, dar «me gusta» o que aparezca un distintivo. Se pasa del final un 10% aproximadamente y vuelve,
cubic-bezier(.34, 1.56, .64, 1). No se usa en paneles grandes: toda la interfaz se tambalearía. - Spring: para devolver algo a su sitio al soltarlo, como el rebote de un panel lateral, tirar para actualizar o el asentamiento tras reordenar arrastrando. Al llegar se balancea una o dos veces antes de detenerse, más parecido a un objeto real que Overshoot; cuando el usuario suelta, el elemento ya lleva velocidad y el resorte puede continuar con ella.
Además, si estas curvas se definen como tokens de movimiento y se usan según su función, todo el producto mantiene el mismo ritmo.
El prompt que acompaña a este consejo enumera primero todas las transiciones y animaciones del proyecto, marca dónde se sigue usando el ease por defecto o un ease-in en una entrada, y qué curva corresponde en cada caso; después añade los tokens de movimiento y ajusta una a una las curvas y las duraciones.
Give the motion in my product the right easing curves, so things arrive, leave and move the way they should feel. Work inside my existing code and design system: keep what each animation does, how far it goes and what triggers it. Change how it moves over time, and its duration where that is off.

0. Start from what exists
- Find every transition and animation: CSS transitions and keyframes, animation libraries (Framer Motion, GSAP, the Web Animations API) and hand-written requestAnimationFrame loops. List each with its component, its trigger, its duration and its curve.
- Flag the ones left on the CSS default `ease`, `linear` on something that moves, and `ease-in` on something that appears.

1. The curves as tokens
Define them once, next to the other motion tokens, and use only these:
- --ease-out: cubic-bezier(0, 0, .58, 1). Anything that enters: toasts, menus, popovers, dialogs, drawers.
- --ease-out-strong: cubic-bezier(.22, 1, .36, 1). Small parts settling in right after a click: an icon, a label, a selected pill. It feels the most responsive.
- --ease-in: cubic-bezier(.42, 0, 1, 1). Anything that leaves, and only that: a toast timing out, a dialog or drawer closing, a menu collapsing, a list item swiped away. It starts slow and leaves at full speed, so on an entrance it feels late and then stops with a bump.
- --ease-in-out: cubic-bezier(.42, 0, .58, 1). Something that stays on screen and only changes place or size: the indicator under tabs or a segmented control, a carousel turning a page, items making room during a reorder, a sidebar resizing, smooth-scrolling to an anchor. Not for coming in: its slow start reads as lag.
- --ease-overshoot: cubic-bezier(.34, 1.56, .64, 1). Runs about 10% past its place and comes back. Small, playful confirmations: a checkbox tick, a like, a badge count popping in, a switch knob settling. Never on a dialog, a drawer or anything larger than about 64px, and not on actions people repeat all day.
- --ease-spring: linear(0, .32, .78, 1.04, 1.09, 1.06, 1.02, 1, .99, .99, 1). Things let go after a drag or a swipe, so they settle like an object: a bottom sheet snapping open or back, a card returning after a half swipe, pull-to-refresh springing back, a reordered item dropping into place. Prefer the animation library's own spring fed with the release velocity; use this token only where there is none, and fall back to --ease-out-strong where linear() is not supported.
- linear: only for things that run rather than move: spinners, progress bars, marquees.
- The CSS default `ease` is not a choice. Replace it wherever a curve was left unset.

2. Durations
- Small UI (toasts, tooltips, menus, checks): 150-250ms in, 120-200ms out. Exits are shorter than entrances.
- Medium (dialogs, popovers with content, drawers): 250-350ms.
- Large or full-screen (sheets, page transitions): 350-500ms. Longer feels slow.
- Springs and overshoots: about 1.5x the plain duration, since the settle takes time.
- Keep the durations as tokens beside the curves (--duration-sm, -md, -lg).

3. Apply them by role
- Entrances: ease-out, coming from where the thing belongs (a toast from the top edge, a menu from its trigger), over a short distance (8-24px), growing from 96% and fading in a little sooner than it moves. A light blur (about 8px) that clears as it lands is a nice touch on toasts.
- Exits: ease-in, the same path reversed, and shorter.
- Moves on screen: ease-in-out.
- Parts inside something that has just appeared (its icon, its text, a count) may follow 100-200ms later on the strong ease-out, so it lands in steps rather than all at once.
- Gestures: while the pointer or finger moves, follow it 1:1 with no easing. On release, finish on the spring, from the release velocity if the library allows.
- Hover and press: 100-150ms ease-out. Never animate layout on hover.
- Animate transform and opacity (filter sparingly), not top, left, width or height, which lay out and repaint every frame.

4. Keep it consistent and accessible
- One curve per role across the product. Don't tune each component by hand.
- Respect prefers-reduced-motion: keep the opacity changes, drop movement and scale, and turn springs and overshoots into a plain 150ms fade.
- Never make a user wait on an animation: nothing blocks input, and a new action interrupts the old animation from where it is.

5. Deliver
- First list every animation you found, its current curve and duration, and the role and curve you will give it.
- Then add the tokens, switch each animation over, and list every file you touched.
- Don't change what animates, how far it goes or what triggers it. If an animation has no clear role, ask me first.