




011 Easing Curves
Easing-Kurven nach Situation wählen
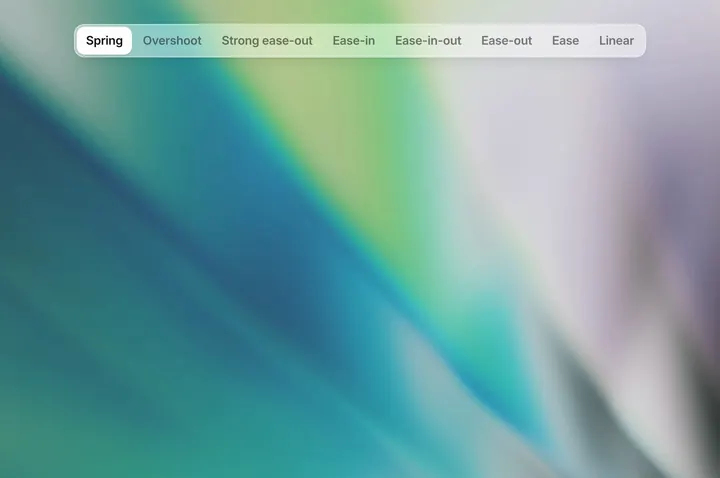
Sieben gängige Easing-Kurven von Linear bis Spring und für welche Bewegungen sie sich jeweils eignen.
Den Rhythmus einer Animation beschreibt eine Geschwindigkeitskurve: Je steiler die Kurve, desto abrupter ändert sich die Geschwindigkeit und desto schneller wirkt die Bewegung. Nutzen das Aufklappen eines Menüs, das Schließen eines Dialogs und das Gleiten eines Indikators alle das voreingestellte ease, kann man nicht unterscheiden, ob ein Element erscheint, verschwindet oder die Position wechselt. Die gängigen Kurven:
- Linear: Für Fortschrittsbalken, Ladeanzeigen und alles, was nur „läuft“. Gleichförmige Bewegung, Start und Ende wirken hart,
linear. - Ease-out und Strong ease-out: Für das Erscheinen von Overlays und modalen Elementen wie Toast, Menü, Dialog und Drawer Ease-out, erst schnell, dann langsam,
cubic-bezier(0, 0, .58, 1). Für kleine Elemente, die nach einem Klick sofort an ihren Platz gehen, etwa Icons, Text oder eine ausgewählte Pille, Strong ease-out mit schnellerem Start und längerem Auslaufen,cubic-bezier(.22, 1, .36, 1); das wirkt am direktesten. - Ease-in: Für das Verschwinden von Elementen, etwa beim Schließen eines Dialogs oder Ausblenden eines Toasts. Erst langsam, dann schnell, das Element geht entschieden ab,
cubic-bezier(.42, 0, 1, 1). Nicht für das Erscheinen verwenden: Der langsame Start wirkt, als reagiere die Oberfläche träge. - Ease-in-out: Für Elemente, die innerhalb der Oberfläche die Position wechseln, etwa den Indikator unter Tabs, das Blättern in einem Karussell oder weiches Scrollen zu einem Abschnitt. An beiden Enden langsam, in der Mitte am schnellsten,
cubic-bezier(.42, 0, .58, 1). - Overshoot: Für kleine, verspielte Bestätigungen wie Abhaken, Liken oder ein aufspringendes Badge. Schießt etwa 10% über das Ziel hinaus und kehrt zurück,
cubic-bezier(.34, 1.56, .64, 1). Nicht für große Panels, sonst wackelt ein ganzer Bereich der Oberfläche. - Spring: Für das Zurückfinden nach dem Loslassen, etwa das Zurückfedern eines Drawers, Pull-to-Refresh oder das Einrasten nach dem Sortieren per Drag-and-drop. Am Ziel schwingt das Element ein- oder zweimal leicht nach und kommt dann zur Ruhe, näher an einem echten Gegenstand als Overshoot; beim Loslassen hat das Element bereits eine Geschwindigkeit, und die Feder kann diese übernehmen.
Außerdem: Definiert man diese Kurven als Motion-Tokens und setzt sie nach Rolle ein, bleibt der Rhythmus im ganzen Produkt einheitlich.
Der zugehörige Prompt listet zuerst alle Übergänge und Animationen im Projekt auf und markiert, wo noch das voreingestellte ease steht oder ease-in für das Erscheinen verwendet wird, jeweils mit der Kurve, die dort hingehört; dann fügt er Motion-Tokens hinzu und passt Kurven und Dauern einzeln an.
Give the motion in my product the right easing curves, so things arrive, leave and move the way they should feel. Work inside my existing code and design system: keep what each animation does, how far it goes and what triggers it. Change how it moves over time, and its duration where that is off.

0. Start from what exists
- Find every transition and animation: CSS transitions and keyframes, animation libraries (Framer Motion, GSAP, the Web Animations API) and hand-written requestAnimationFrame loops. List each with its component, its trigger, its duration and its curve.
- Flag the ones left on the CSS default `ease`, `linear` on something that moves, and `ease-in` on something that appears.

1. The curves as tokens
Define them once, next to the other motion tokens, and use only these:
- --ease-out: cubic-bezier(0, 0, .58, 1). Anything that enters: toasts, menus, popovers, dialogs, drawers.
- --ease-out-strong: cubic-bezier(.22, 1, .36, 1). Small parts settling in right after a click: an icon, a label, a selected pill. It feels the most responsive.
- --ease-in: cubic-bezier(.42, 0, 1, 1). Anything that leaves, and only that: a toast timing out, a dialog or drawer closing, a menu collapsing, a list item swiped away. It starts slow and leaves at full speed, so on an entrance it feels late and then stops with a bump.
- --ease-in-out: cubic-bezier(.42, 0, .58, 1). Something that stays on screen and only changes place or size: the indicator under tabs or a segmented control, a carousel turning a page, items making room during a reorder, a sidebar resizing, smooth-scrolling to an anchor. Not for coming in: its slow start reads as lag.
- --ease-overshoot: cubic-bezier(.34, 1.56, .64, 1). Runs about 10% past its place and comes back. Small, playful confirmations: a checkbox tick, a like, a badge count popping in, a switch knob settling. Never on a dialog, a drawer or anything larger than about 64px, and not on actions people repeat all day.
- --ease-spring: linear(0, .32, .78, 1.04, 1.09, 1.06, 1.02, 1, .99, .99, 1). Things let go after a drag or a swipe, so they settle like an object: a bottom sheet snapping open or back, a card returning after a half swipe, pull-to-refresh springing back, a reordered item dropping into place. Prefer the animation library's own spring fed with the release velocity; use this token only where there is none, and fall back to --ease-out-strong where linear() is not supported.
- linear: only for things that run rather than move: spinners, progress bars, marquees.
- The CSS default `ease` is not a choice. Replace it wherever a curve was left unset.

2. Durations
- Small UI (toasts, tooltips, menus, checks): 150-250ms in, 120-200ms out. Exits are shorter than entrances.
- Medium (dialogs, popovers with content, drawers): 250-350ms.
- Large or full-screen (sheets, page transitions): 350-500ms. Longer feels slow.
- Springs and overshoots: about 1.5x the plain duration, since the settle takes time.
- Keep the durations as tokens beside the curves (--duration-sm, -md, -lg).

3. Apply them by role
- Entrances: ease-out, coming from where the thing belongs (a toast from the top edge, a menu from its trigger), over a short distance (8-24px), growing from 96% and fading in a little sooner than it moves. A light blur (about 8px) that clears as it lands is a nice touch on toasts.
- Exits: ease-in, the same path reversed, and shorter.
- Moves on screen: ease-in-out.
- Parts inside something that has just appeared (its icon, its text, a count) may follow 100-200ms later on the strong ease-out, so it lands in steps rather than all at once.
- Gestures: while the pointer or finger moves, follow it 1:1 with no easing. On release, finish on the spring, from the release velocity if the library allows.
- Hover and press: 100-150ms ease-out. Never animate layout on hover.
- Animate transform and opacity (filter sparingly), not top, left, width or height, which lay out and repaint every frame.

4. Keep it consistent and accessible
- One curve per role across the product. Don't tune each component by hand.
- Respect prefers-reduced-motion: keep the opacity changes, drop movement and scale, and turn springs and overshoots into a plain 150ms fade.
- Never make a user wait on an animation: nothing blocks input, and a new action interrupts the old animation from where it is.

5. Deliver
- First list every animation you found, its current curve and duration, and the role and curve you will give it.
- Then add the tokens, switch each animation over, and list every file you touched.
- Don't change what animates, how far it goes or what triggers it. If an animation has no clear role, ask me first.